
Halloween is one of the most creative times of the year. Everyone wants shirts, hoodies, and bags that show off spooky and fun designs. If you’re planning to print your own Halloween gear, DTF transfers are your best choice.
They’re bright, long lasting, and work well on most fabrics. The best part? You don’t need years of experience to make them look professional. You just need to know how to apply DTF transfers correctly.
This easy guide will walk you through every step so you can press Halloween designs that look great and stay that way.
Step 1: Get Your Tools and Setup Ready
Before pressing anything, make sure your setup is clean and organized. A small bit of dust can mess up the final look.
Here’s what you need:
-
A heat press machine
-
Your Halloween DTF transfers
-
The shirt or fabric you’ll press on
-
A lint roller
-
A Teflon sheet or parchment paper
Having everything ready makes the process smoother and faster.
Step 2: Prepare the Fabric Before Pressing
Good prints start with good prep. Proper fabric prep for DTF application helps the design stick better and last longer.
Lay the shirt flat and use a lint roller to remove any loose fibers or dust. Then pre-press the garment before applying DTF for about 5 seconds. This removes moisture and wrinkles, giving you a smooth surface to work on.
A dry, wrinkle free shirt is key to a clean, professional finish.
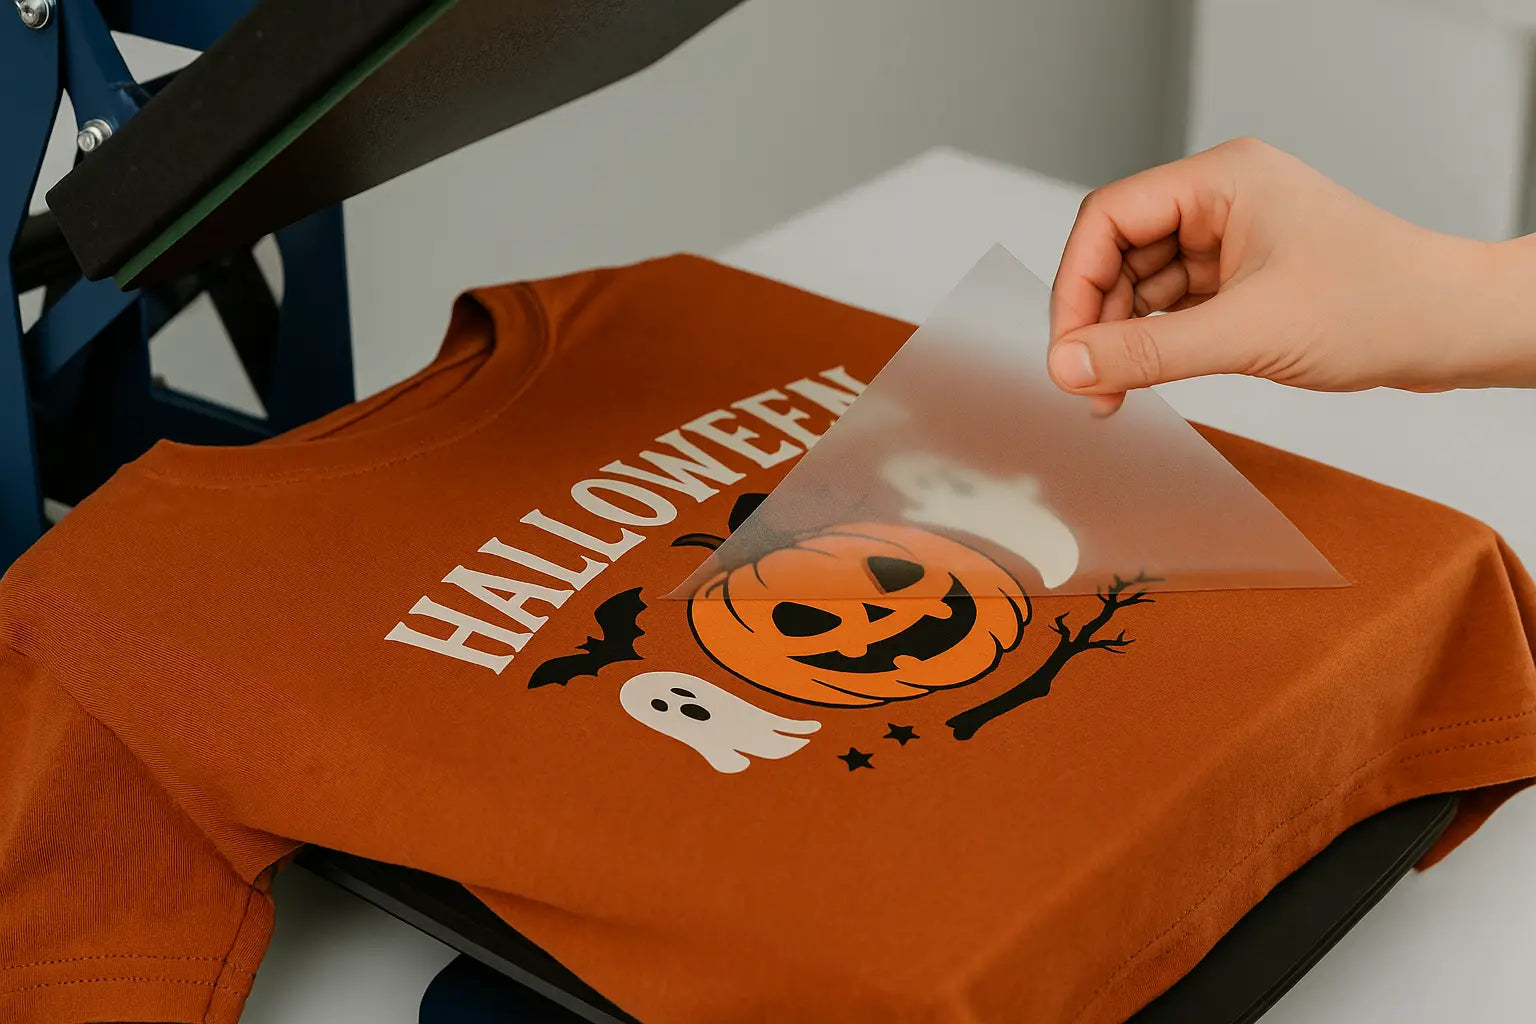
Step 3: Position Your Design the Right Way
Now it’s time to line up your transfer. Place your Halloween shirt DTF transfer application exactly where you want it. Center it or position it creatively, your call.
Make sure the film side is up and the print side is facing the shirt. You can use heat resistant tape to keep it from moving when pressing.
Taking a few extra seconds here will make your final shirt look much better.
Step 4: Set the Right Heat Press Settings
This step makes or breaks the print. Using the right heat press settings for DTF Halloween prints gives you bold colors and perfect adhesion.
Here’s what usually works best:
-
Temperature: 305°F (150°C)
-
Pressure: Medium to firm
-
Time: 10–15 seconds
Always place a Teflon sheet or parchment paper on top of the design to protect it.
These DTF transfer application instructions help you get bright, even prints that last.
Step 5: Let It Cool, Then Peel Slowly
Once pressed, wait a few seconds. Letting it cool helps the transfer bond better. Most Halloween DTF transfers need a cold peel.
When cool, peel from one corner slowly. If a small part didn’t stick, place it back, cover with parchment paper, and press again for about 5 seconds.
Take your time, slow and steady gives the best results.
Step 6: Do a Final Press
This last step locks in the design and gives it a smooth, soft feel.
After peeling, press again for about 5 seconds at 305°F. Cover the design with parchment paper before pressing.
This quick final press ensures your DTF Halloween prints look professional and survive wash after wash.
Step 7: Take Care of Your Finished Shirts
Once your designs are done, wash them the right way to keep them looking new:
-
Wash inside out with cold water.
-
Avoid bleach or harsh detergent.
-
Air dry or tumble dry low.
With simple care, your Halloween DTF transfers will stay bright and detailed for a long time.
Why DTF Transfers Are Perfect for Halloween
Halloween is all about detail, ghosts, pumpkins, webs, and everything spooky. DTF printing handles those fine details perfectly.
Unlike vinyl or screen printing, it can print full color designs that pop. It’s also quick, making it perfect for holiday DTF transfer application guides or last minute merch orders.
Learning how to apply DTF transfers properly helps you create shirts that look store bought, even if you’re pressing them at home.
Pro Tips for Better Results
-
Always store transfers flat and in a cool place.
-
Do a small test press before doing a full batch.
-
Avoid too much heat or pressure, it can dull the print.
-
Always pre-press garment before applying DTF.
A few careful steps make a big difference.
Conclusion
Now that you know how to apply DTF transfers, you’re ready to create fun and bold Halloween apparel that lasts.
Following this apply DTF transfer step-by-step guide will help you make shirts, hoodies, or tote bags that stand out this spooky season.
For high quality transfers and quick service, visit dtf west coast. They offer top notch Halloween DTF transfers, clear DTF pressing settings for Halloween designs, and everything you need to print like a pro.
FAQs
1. What’s the best temperature for Halloween DTF transfers?
Press at 305°F for about 10–15 seconds using medium pressure. These DTF pressing settings for Halloween designs give strong adhesion and bright prints.
2. Why should I pre press before applying DTF?
Pre-press garment before applying DTF removes moisture and wrinkles, helping the transfer stick evenly for a smooth, durable finish.
3. Can I apply DTF transfers on polyester shirts?
Yes. You can use DTF transfer application instructions for polyester, cotton, or blends. Just adjust your heat and pressure slightly if needed.
4. How can I prevent bubbles under my DTF print?
Do proper fabric prep for DTF application, remove lint, smooth the fabric, and use even pressure when pressing to avoid trapped air.
5. What should I do if the print doesn’t stick well?
Repress the spot for 5 seconds with correct heat and pressure. Following your holiday DTF transfer application guide helps you get perfect adhesion every time.
Share:
Creating Custom Halloween Merch with DTF Transfers for Your Local Event
Why Fashion Brands Are Choosing DTF Transfers for Black Friday Drops