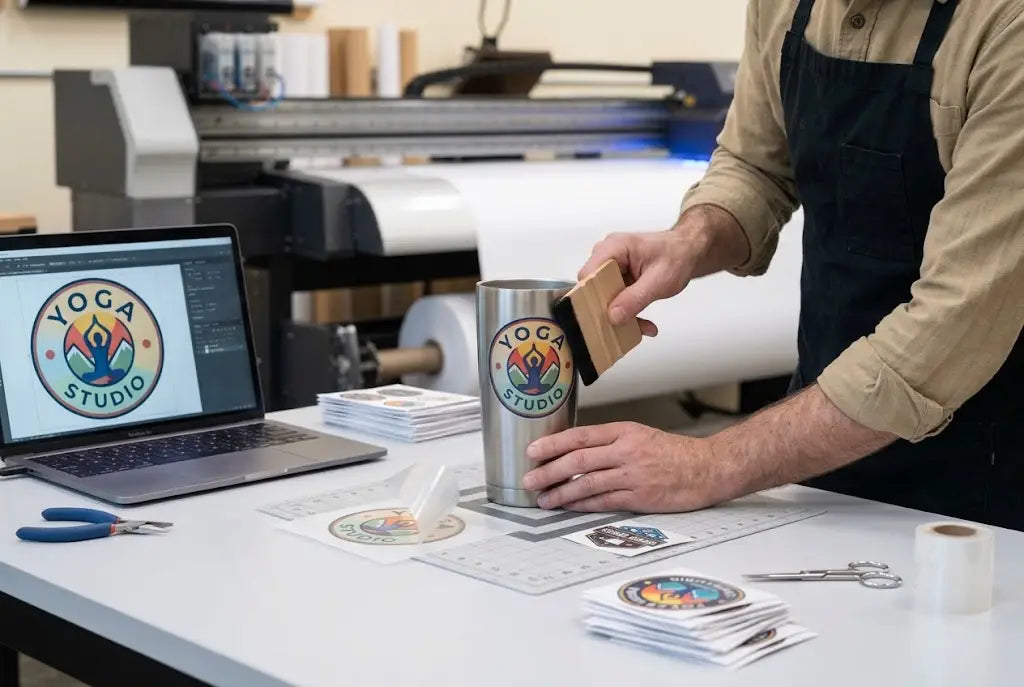
UV DTF transfers for tumblers work best on dry, smooth tumbler surfaces. Start by wiping the cup with alcohol, letting it dry, lining up the transfer before it touches the surface, pressing from the center outward, rubbing with pressure,e and peeling the carrier film slowly. Once the decal touches the tumbler, do not move it around. Move it around. That is where bubbles, wrinkles, and stretched edges happen.
For West Coast creators, drinkware sellers, event brands, and small shops, UV DTF makes custom tumblers easier because the design arrives ready to apply. DTF West Coast helps businesses order peel-and-stick UV DTF transfers for hard-surface branding, gifts, drinkware, and custom product drops.
What to Know Before Applying UV DTF Tumbler Transfers
UV DTF transfers for tumblers are made for smooth hard surfaces, not fabric.
UV DTF tumbler transfers should be applied only after the tumbler is cleaned, dried,d and checked for dust or oil.
Good UV DTF transfer application depends on alignment, firm pressure, and a slow peel.
A clean UV DTF cup wrap application starts with measuring the wrap area before placing the transfer.
Tumbler customization works best when the artwork matches the cup shape, color, curve, and use.
What Are UV DTF Transfers for Tumblers?
UV DTF transfers for tumblers are peel-and-stick decals printed with UV-cured ink and designed for surfaces like stainless steel cups, plastic tumblers, glass drinkware, acrylic blanks, and smooth-coated items.
They are different from fabric DTF transfers. No heat press is needed. No fabric bonding. No powder adhesive. You apply the decal by hand using pressure.
Why tumbler sellers like them
These allow you to add full-color artwork, logos, names, patterns, and small details without using vinyl layering or weeding.
What these are best for
These work well for boutique cups, corporate gifts, event drinkware, school merch, wedding favors, small business branding, and seasonal product drops.
Why Surface Prep Matters So Much
Surface prep sounds boring. It is not.
Surface prep is the part that decides whether the transfer sticks cleanly or starts lifting at the edge. Oil from your hands, dust, lotion, cup residue, or leftover packaging film can weaken surface prep adhesion.
Clean first
Wipe the tumbler with isopropyl alcohol and a lint-free cloth. Let the tumbler dry fully before placing the transfer.
Touch less
After cleaning, avoid touching the design area with your fingers. Skin oils are sneaky.
UV DTF Tumbler Transfers vs Regular Stickers
UV DTF tumbler transfers create a raised, printed decal look. Regular stickers are usually flat adhesive pieces.
UV DTF decals can make a tumbler feel more premium because the design sits on the surface with a clean, dimensional finish. But they still need a smooth surface and careful placement.
|
Feature |
UV DTF Tumbler Transfer |
Regular Sticker |
|
Finish |
Raised decal look |
Flat sticker look |
|
Application |
Rub and peel carrier film |
Peel and stick |
|
Best surface |
Smooth hard surfaces |
Varies by sticker |
|
Detail |
Good for logos and patterns |
Depends on print type |
|
Setup |
No heat press |
No heat press |
|
Best use |
Custom cups and branding |
Labels and simple decals |
UV DTF Tumbler Instructions Before You Start
Good UV DTF tumbler instructions start before the decal touches the cup.
Check the cup. Check the artwork. Check the curve. Check the lighting. Yes, lighting. Bad lighting makes alignment harder than it needs to be.
Before applying, confirm:
- The tumbler surface is smooth.
- The cup is clean and dry.
- The design fits the printable area.
- The transfer has no dust on the adhesive side.
- The artwork is facing the correct direction.
- The cup is stable and will not roll.
- Your hands are clean and dry.
- You have a squeegee or firm rubbing tool ready.
How to Put UV DTF on a Tumbler
How to put UV DTF on a tumbler starts with alignment.
Hold the transfer over the cup and decide the exact placement before peeling the backing. Use the cup seam, handle position, lid line, or center point as a guide. Once ready, peel the backing carefully and place one edge of the transfer first.
Press from the center outward
Use your fingers or a squeegee to press the design down from the center toward the edges. This helps push out air.
Rub with pressure
Rub every part of the design. Pay extra attention to small letters, thin lines, corners, and edges.
How to Put UV DTF Transfer on Tumbler Without Bubbles
How to put UV DTF transfer on a tumbler without bubbles comes down to slow placement and firm pressure.
Do not slap the full design onto the cup at once. That is asking for trouble. Start at one side or center point, then work across the design with steady pressure.
Bubble control tips
If a small bubble appears during application, press it outward before peeling the carrier film. Do not peel early and hope it fixes itself. It usually does not.
Do not rush the peel.
Peel the carrier film slowly at a low angle. If part of the design lifts, lay the film back down and rub again.
How to Apply UV DTF Cup Wrap
How to apply UV DTF cup wrap is a little different from applying a small logo.
Cup wraps are larger and need more alignment. A small crooked logo is annoying. A crooked wrap? Painful.
Start with measuring
Measure the height and width of the wrap area. Make sure the design does not hit the lid line, bottom curve, handle, or tapered section.
Use a hinge method
Tape one side of the wrap in place before removing the backing. This helps keep the design from shifting.
UV DTF Cup Wrap Application for Curved Tumblers
UV DTF cup wrap application needs patience because cups curve.
Work slowly around the tumbler. Press small sections at a time. Keep the transfer smooth as it wraps around the cup body.
Watch tapered cups
Straight wraps may not line up perfectly on tapered tumblers. If the cup narrows toward the bottom, test sizing before making a large batch.
Keep the cup still
Use a towel, cradle, or soft work surface to keep the tumbler from rolling while you apply the wrap.
How to Apply UV DTF Tumbler Wrap
How to apply a UV DTF tumbler wrap is all about control.
Start with the center or one vertical edge. Keep the transfer tight but not stretched. Press across the design in sections. Rub each area before moving on.
Peel in stages
For larger wraps, peel the carrier film slowly and watch every detail. If letters lift, stop. Rub again. Then keep peeling.
Let it settle
After applying, avoid picking at the edges. Let the adhesive settle before heavy handling.
Tumbler Customization Ideas That Work
Tumbler customization works best when the design fits the cup’s real use.
A gym bottle needs bold lettering. A wedding tumbler can use names and dates. A coffee shop cup can use a clean logo. A boutique tumbler can use a full wrap with pattern art.
|
Tumbler Style |
Best Design Idea |
Smart Tip |
|
Stainless steel cup |
Logo or full wrap |
Use bold contrast |
|
Clear tumbler |
Small decal or name |
Check visibility |
|
Kids cup |
Simple icon art |
Avoid tiny text |
|
Wedding cup |
Names and date |
Keep it elegant |
|
Corporate cup |
Brand logo |
Use clean spacing |
|
Boutique cup |
Pattern wrap |
Test curve fit |
Personalized Tumblers for Gifts and Brands
Personalized tumblers are popular because they feel useful and personal at the same time.
You can add names, initials, teacher titles, team logos, business branding, pet names, holiday art, or event details. A tumbler is not just a cup. It is a daily-use item, which makes the design more visible.
West Coast examples
A Seattle coffee brand can add logo decals. A Portland maker can sell custom market cups. A Los Angeles boutique can launch themed drinkware. A San Diego wedding planner can create guest gifts.
Tumbler Stickers vs Full Wraps
Tumbler stickers are smaller decals, while wraps cover more of the cup.
Small decals are easier to place and great for logos, names, and icons. Full wraps create a bigger look but require more care.
Use stickers when
You want quick branding, smaller personalized names, or simple product add-ons.
Use wraps when
You want a bold retail product, seasonal drop, or design that covers more of the tumbler body.
Common UV DTF Transfer Application Mistakes
The most common UV DTF transfer application mistake is placing the decal before checking alignment.
Another mistake is peeling too fast. And then there is the classic one: applying over dust. Tiny dust, huge irritation.
“Clean surface, slow peel, firm pressure. That is the whole game.”
Simple, but it saves cups.
Avoid these problems
Avoid wet surfaces, oily cups, textured tumblers, rushed peeling, weak rubbing, touching the adhesive, and placing designs too close to lids or curves.
UV DTF for West Coast Product Sellers
Custom drinkware fits local product sellers well.
Markets in Portland school fundraisers, in Seattle event merch, in Los Angeles wedding gifts, and in San Diego and startup swag in the Bay Area all need small-batch customization that looks polished.
The U.S. Census Bureau reported adjusted U.S. Retail e-commerce sales of $340.2 billion for the second quarter of 2026, which shows how active online retail remains for sellers testing custom products.
Order UV DTF Transfers for Tumblers With DTF West Coast
I have found that UV DTF transfers for tumblers work best when the cup is smooth, the surface is clean the artwork fits the curve. The application is slow.
DTF West Coast helps West Coast creators, tumbler sellers, event planners, schools, and small businesses order UV DTF tumbler decals, cup wraps, custom transfer sheet,s and hard‑surface branding transfers.
FAQ
What are UV DTF transfers for tumblers?
UV DTF transfers for tumblers are peel-and-stick UV-printed decals made for applying designs to smooth hard drinkware surfaces.
What are UV DTF tumbler transfers used for?
UV DTF tumbler transfers are used for custom cups, brand logos, gifts, wedding drinkware, event merch, and personalized product designs.
How do you put UV DTF on a tumbler?
How to put UV DTF on a tumbler starts by cleaning the cup, aligning the transfer, pressing from the center outward, rubbing firmly, and peeling slowly.
How do you put UV DTF transfer on a tumbler without bubbles?
How to put UV DTF transfer on a tumbler without bubbles means applying slowly, using firm pressure, and pushing air outward before peeling the carrier film.
How do you apply UV DTF cup wrap?
How to apply UV DTF cup wrap starts with measuring the cup, lining up the wrap, anchoring one side, pressing in sections, and peeling slowly.
How do you apply UV DTF tumbler wrap?
How to apply UV DTF tumbler wrap means working around the cup in small sections while keeping the transfer smooth and firmly pressed.
What are personalized tumblers?
Personalized tumblers are custom drinkware items with names, logos, dates, phrases, or artwork added for gifts, events, brands, or resale.
Are tumbler stickers the same as UV DTF transfers?
Tumbler stickers can refer to many decal types, while UV DTF transfers usually create a raised printed decal look for smooth hard surfaces.
Conclusion
Applying UV DTF to tumblers is simple, but the little details matter.
Clean the cup. Line up the artwork. Press with purpose. Peel slowly. Avoid dust, oil, curves, and rushing. That is how a tumbler goes from “almost good” to clean, giftable, and ready to sell.
Share:
How to Prepare Multiple Logos for a DTF Gang Sheet